
To remove nocks from carbon arrows, follow these steps: Use a heat source to warm the nock, then gently twist and pull it off. When removing nocks from carbon arrows, it’s important to take the necessary precautions.
Carbon arrows can be delicate, so you need to be gentle when handling them. Additionally, using a heat source to warm the nock before attempting to remove it can make the process easier. By applying just enough heat, the plastic material becomes more flexible, allowing you to gently twist and pull off the nock without damaging the arrow.
With these steps, you can safely and effectively remove nocks from carbon arrows, ensuring smooth and convenient arrow maintenance.
Why Proper Nock Removal Is Essential For Carbon Arrows
Proper nock removal is crucial for carbon arrows to maintain their structure and accuracy. Learn how to remove nocks from carbon arrows with these helpful tips safely.
Protecting The Structural Integrity Of Your Carbon Arrows
- Removing the nocks from carbon arrows is essential for preserving their structural integrity and ensuring their longevity.
- The process of removing the nocks allows you to inspect the arrow shaft for any signs of damage or wear.
- By regularly checking the condition of your arrows, you can identify and address any issues before they become more serious.
- Proper nock removal also prevents unnecessary stress on the arrow shaft, reducing the risk of fractures or breaks.
- Maintaining the structural integrity of your carbon arrows is crucial for consistent and accurate shooting.
Reducing The Risk Of Damage To Your Bow
- Removing the nocks from carbon arrows correctly is not only beneficial for the arrows themselves but also for your bow.
- Failure to remove the nocks properly can result in the arrow getting stuck in the bow’s string or rest, potentially causing damage.
- This damage can range from minor scratches and dents to more severe issues like string fraying or misalignment of the bow components.
- By mastering the technique of nock removal, you can minimize the risk of any harm to your bow and ensure its longevity.
- Taking care of your bow will ultimately lead to more enjoyable shooting experiences.
Ensuring Accurate And Consistent Arrow Flight
- Proper nock removal is critical for achieving accurate and consistent arrow flight.
- When the nocks are not removed correctly, the arrow may not sit flush against the bowstring, leading to imprecise aim.
- Misalignment of the arrow can cause inconsistent arrow flight patterns, making it challenging to achieve tight groupings.
- By removing the nocks properly, you ensure that each arrow is uniformly seated on the bowstring, promoting consistent release and flight.
- Consistent arrow flight is paramount for archers aiming for accuracy and success in different shooting scenarios.
Remember, taking the time to remove the nocks from your carbon arrows correctly not only protects the arrows themselves but also prevents potential damage to your bow. It also ensures that each arrow flies accurately and consistently, setting you up for success.
Master the art of nock removal, and you’ll be well on your way to becoming a skilled and confident archer.
Assessing The Nock And Arrow Condition
Learn how to remove nocks from carbon arrows effectively with our comprehensive guide on assessing the condition of your nock and arrow.
When it comes to removing nocks from carbon arrows, it’s crucial to assess the overall condition of both the nock and the arrow itself. By thoroughly inspecting each component, you can ensure that your equipment is safe and ready for use.
Here are the key steps to follow when assessing the nock and arrow condition:
Checking For Any Signs Of Wear Or Damage To The Nock:
- Look for any visible cracks, chips, or deformities in the nock.
- Inspect the nock carefully to ensure it is securely attached to the arrow shaft.
- Check for any excessive wear or fraying around the edges of the nock.
- Make sure the nock’s size and shape match the requirements of your bowstring.
Inspecting The Arrow Shaft For Any Cracks Or Splintering:
- Run your fingers along the entire length of the arrow shaft to detect any irregularities or rough spots.
- Look for any visible cracks, splintering, or damage to the carbon fibers.
- Pay special attention to areas near the fletching and the point where the nock is attached.
- If you notice any significant damage, it may be necessary to replace the arrow shaft.
Examining The Fletching And Arrowhead For Any Issues:
- Inspect the fletching (feathers or vanes) for any signs of wear, such as bending, tearing, or missing pieces.
- Check that the fletching is securely attached to the arrow shaft without any loose or wobbly feathers.
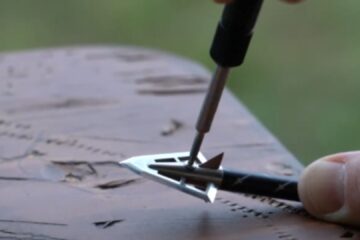
- Examine the arrowhead (broadhead or field point) for any damage, including bent blades or chipped tips.
- Ensure that the arrowhead is properly aligned with the shaft and securely fastened.
Remember, it’s important to handle your carbon arrows with care and regularly assess their condition to maintain optimal performance. By following these steps and replacing any worn or damaged components, you can ensure a safe and accurate shooting experience.
Removing Nocks Without Damaging Arrows
Learn how to remove nocks from carbon arrows without causing damage. Discover the steps to safely disengage the nocks from your arrows while preserving their quality and functionality.
Choosing The Right Tool For Nock Removal
- It is important to choose the right tool for removing nocks from carbon arrows to avoid any damage.
- Use a nock removal tool or a small pair of pliers specifically designed for this purpose.
- Make sure the tool is suitable for your arrow type and size.
Applying Heat Or Lubrication For Easier Removal
- Applying heat or lubrication can make it easier to remove the nocks without damaging the arrows.
- Use a hairdryer or a heat gun to gently warm up the area around the nock.
- This will make the plastic or adhesive material more pliable and easier to work with.
- Alternatively, you can apply a small amount of lubricant, such as arrow release fluid, to the nock area.
Gentle Twisting And Pulling Motion To Remove The Nock
- Once the nock is warmed up or lubricated, gently twist and pull it in a twisting and pulling motion.
- Start by gripping the nock firmly with a pair of pliers or using the nock removal tool.
- Slowly twist and pull the nock out of the arrow shaft, using gentle and steady pressure.
- Be careful not to use excessive force that could result in damaging the arrow.
- If the nock doesn’t come out easily, try applying more heat or lubrication to loosen it further.
Common Mistakes To Avoid During Nock Removal
Learn the dos and don’ts of removing nocks from carbon arrows. Avoid common mistakes and follow these guidelines for a smooth and successful process.
Using excessive force that may damage the arrow shaft:
- Applying too much pressure while removing the nock can lead to irreversible damage to the carbon arrow shaft. It is essential to exercise caution and avoid excessive force.
- Use gentle and controlled pressure to gradually ease the nock out of the arrow shaft.
Neglecting to inspect the nock before removal:
- Before attempting to remove the nock, inspect it for any signs of damage or wear. Damaged or worn-out nocks should be replaced rather than removed.
- Look for cracks, chips, or any other visible damage that may compromise the functionality of the nock.
Rushing the process and risking potential damage:
- It is crucial to take your time during the nock removal process. Rushing can result in unintentional damage to the arrow shaft or the nock itself.
- Avoid rushing or being overly impatient, as this can lead to costly mistakes. Take it slow and be meticulous in your approach.
Remember, proper nock removal requires patience and careful attention to detail. By avoiding these common mistakes, you can ensure the process goes smoothly and protect the integrity of your carbon arrows.
Proper Maintenance And Care For Carbon Arrows
To properly maintain and care for carbon arrows, it’s important to know how to remove nocks without damaging the arrows. Following these guidelines will ensure the longevity and performance of your carbon arrows.
Carbon arrows are a popular choice for archers due to their strength, durability, and improved accuracy. However, like any other equipment, they require proper maintenance and care to ensure their longevity and performance. In this section, we will discuss the essential steps to keep your carbon arrows in excellent condition.
This includes cleaning the arrow shaft after nock removal, inspecting and replacing damaged nocks, and storing the arrows correctly to prevent deformation.
Cleaning The Arrow Shaft After Nock Removal:
After removing the nock from a carbon arrow, it is crucial to clean the arrow shaft thoroughly. This ensures that dirt, debris, and residual adhesive are removed, allowing for a smooth, consistent release.
Here’s how you can clean the arrow shaft effectively:
- Use a clean, lint-free cloth or paper towel to wipe away any loose dirt or dust from the arrow shaft.
- Moisten another cloth or paper towel with isopropyl alcohol, and gently wipe the shaft to remove any remaining residue. Be careful not to soak the arrow shaft, as excessive moisture can damage the carbon fibers.
- Inspect the shaft carefully to ensure it is clean and free from any dirt or adhesive. Repeat the cleaning process if necessary.
- Allow the arrow shaft to air dry completely before proceeding with any further maintenance or storage.
Inspecting And Replacing Damaged Nocks:
- Regularly inspecting your nocks is essential to identify any cracks, chips, or other damages that may compromise the arrow’s flight or safety. Here’s how you can inspect and replace damaged nocks:
- Start by visually examining the nock for any visible signs of damage, such as cracks or deformations.
- Gently squeeze the nock to check for any flexibility or excessive give. If it feels loose or shows signs of wear, it may need to be replaced.
- Using a nock pliers or a small pair of pliers, carefully remove the damaged nock from the arrow shaft.
- Install a new nock onto the arrow shaft, ensuring a secure fit. It should not be too loose or too tight. The positioning should align with your preferred shooting style or bow setup.
Storing The Arrows Correctly To Prevent Deformation:
Proper storage is vital to prevent carbon arrows from deforming, maintaining their straightness and integrity.
Here are some guidelines for storing your carbon arrows correctly:
- Store your arrows in a dedicated arrow tube or quiver, designed to protect and maintain their shape.
- Avoid storing arrows in extreme temperatures or high humidity environments, as these conditions can cause the carbon fibers to expand or contract, leading to deformations.
- Ensure that the arrows are stored vertically, with the points facing downward. This helps distribute the weight evenly and prevents warping.
- Never stack heavy objects on top of your arrows or expose them to excessive pressure, as this can cause bending or fractures in the shafts.
- Inspect your stored arrows regularly for any signs of damage or deformation. If any issues are detected, address them promptly to prevent further deterioration.
By following these proper maintenance and care practices, you can extend the lifespan of your carbon arrows and optimize their overall performance. Remember to clean the arrow shaft after nock removal, inspect and replace damaged nocks as necessary, and store your arrows correctly to prevent deformation.
Happy shooting!
Expert Tips For Nock Removal With Different Types Of Carbon Arrows
Remove nocks from carbon arrows effortlessly with these expert tips. Whether you’re using traditional, press-fit, or glue-on nocks, these techniques will ensure a smooth removal process for your carbon arrows.
Carbon arrows are a popular choice among archery enthusiasts due to their durability and performance. However, when it comes to removing nocks from carbon arrows, it can be a bit tricky, especially considering the different types of arrows available. In this section, we will provide you with expert tips on removing press-fit internal nocks, removing bushings and outserts for external nocks, and safely removing nocks from break-off style arrows.
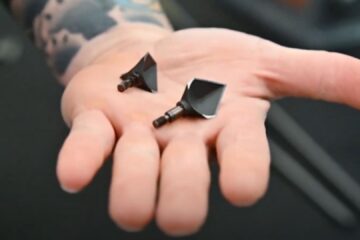
Removing Press-Fit Internal Nocks:
- Apply heat: Use a heat gun or hairdryer to warm up the area around the nock. This will help loosen the adhesive and make removal easier.
- Twist and pull: Grip the arrow shaft firmly and twist the nock in a clockwise or counterclockwise direction while applying gentle pulling pressure. The goal is to break the bond between the nock and the arrow shaft.
- Wiggle and rotate: If the nock doesn’t come off easily, try wiggling it back and forth while rotating it gently. This motion can help loosen the grip of the adhesive.
Removing Bushings And Outserts For External Nocks:
- Use a screwdriver: If the bushing or outsert is screwed onto the arrow shaft, use a screwdriver to unscrew it in a counterclockwise direction.
- Apply lubricant: If the bushing or outsert seems stuck, applying a small amount of lubricant, such as silicone or arrow lubricant, can help loosen it. After applying the lubricant, give it a few minutes to work its magic before attempting to remove the bushing or outsert again.
- Use pliers: If the bushing or outsert is press-fit, you may need to use pliers or a special tool designed for this purpose. Grip the bushing or outsert firmly and twist it gently while applying upward pressure. Be careful not to damage the arrow shaft while doing so.
Safely Removing Nocks From Break-Off Style Arrows:
- Protect the shaft: Wrap the arrow shaft with a cloth or place it in a padded vice to prevent any damage during the process.
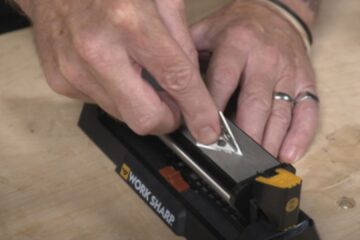
- Score the nock: Use a sharp utility knife or a specialized arrow tool to carefully score around the base of the nock. This will weaken the bond between the nock and the arrow shaft, making it easier to remove.
- Break the nock: Apply gentle pressure to the sides of the nock to break it off from the arrow shaft. If necessary, use pliers to grasp and twist the broken part of the nock to remove it completely.
Remember, it’s essential to take your time and be patient when removing nocks from carbon arrows, as rushing the process can lead to damage. By following these expert tips, you’ll be able to remove nocks from different types of carbon arrows with ease and precision.
Happy arrow maintenance and good luck with your archery endeavors!
Troubleshooting Nock Removal Issues
Have trouble removing nocks from your carbon arrows? Follow these simple steps for troubleshooting and ensure an easy removal process.
Nock Stuck Or Difficult To Remove:
If you are having trouble removing the nock from your carbon arrows, here are a few troubleshooting tips to help you out:
- Apply heat: Gently heating the area around the nock with a hairdryer or heat gun can help loosen it. Be cautious not to overheat and damage the arrow.
- Use lubrication: Applying a small amount of lubricant, such as arrow release fluid or silicone spray, can make the nock easier to remove. Just ensure the lubricant is compatible with your arrow material.
- Twist and pull technique: While firmly holding the arrow shaft, gently twist and pull the nock in a circular motion. This motion can help break any adhesive or friction holding the nock in place.
- Nock pliers: Investing in a pair of nock pliers can be beneficial when dealing with stubborn or tight-fitting nocks. The pliers provide a better grip and leverage for removal.
Remember, patience is key when removing a stuck or difficult nock. Take your time and proceed carefully to avoid damaging the arrow.
Damage To The Arrow When Removing The Nock:
While removing a nock, it is essential to be cautious to prevent any damage to the arrow. Here are a few tips to avoid causing harm:
- Avoid excessive force: Applying too much force when removing a nock can lead to structural damage or even break the arrow. Be gentle and patient throughout the process.
- Use proper tools: Using the correct tools designed specifically for nock removal, such as nock pliers or a nock removal tool, can minimize the risk of accidental damage to the arrow.
- Inspect the arrow: Before and after removing the nock, inspect the arrow for any signs of damage, including cracks, splinters, or deformations. If you notice any issues, consider replacing the arrow to ensure your safety while shooting.
Good maintenance and careful handling will help preserve the integrity of your carbon arrows during the nock removal process.
Seeking Professional Assistance When In Doubt:
If you find yourself unsure or uncomfortable removing a nock from your carbon arrow, it’s always a good idea to seek professional assistance. A knowledgeable technician or archery professional can provide expert guidance and ensure the job is done correctly.
Here are a few reasons why seeking professional assistance may be beneficial:
- Expertise: Professionals have experience dealing with different arrow types and can navigate various challenges that arise during nock removal.
- Safety: Professionals can mitigate safety risks associated with improper nock removal or potential arrow damage.
- Equipment: They have access to specialized tools and equipment that might not be readily available to the average archer.
While it may involve a small cost, seeking professional help can save you time, effort, and potential damage to your carbon arrows.
Conclusion: Mastering The Art Of Nock Removal For Carbon Arrows
Mastering the art of removing nocks from carbon arrows requires precision and caution. By following the proper techniques, you can ensure a smooth and successful process, preserving the integrity of your arrows.
Importance Of Proper Nock Removal Techniques
- Ensure consistent arrow performance: Removing nocks correctly is crucial for maintaining the integrity and performance of carbon arrows. Proper removal prevents damage to the shaft, preserves arrow straightness, and guarantees accurate shots.
- Minimize nock damage: Mishandling or using improper techniques can cause nocks to splinter or crack, rendering them unusable. Following appropriate nock removal methods helps to extend the lifespan of your arrows and reduce the need for frequent replacements.
- Enhance arrow customization: Efficiently removing nocks allows you to easily replace them with different styles or colors to personalize your arrows. This flexibility opens up possibilities for customization, ensuring your equipment reflects your preferences and enhances your shooting experience.
Regular Maintenance For Optimal Arrow Performance
- Inspect for wear and tear: Regularly examining your carbon arrows for signs of damage, including worn-out or loose nocks, is vital. Identifying issues early allows for prompt repairs or replacements, ensuring optimal arrow performance during shooting sessions.
- Clean arrows thoroughly: As part of regular maintenance, clean your arrows properly to remove dirt, debris, and residue that may accumulate on the shaft and around the nock area. This helps prevent unnecessary friction, maintains arrow flight stability, and extends the life of your equipment.
- Evaluate nock fit: Regularly check the fit of your nocks to ensure they are secure and snug on the arrow shaft. Loose or ill-fitting nocks may affect accuracy and consistency. If needed, replace worn-out or damaged nocks promptly to maintain optimal arrow performance.
Keeping Safety As The Top Priority In The Process
- Use protective gear: Prioritize personal safety by wearing appropriate protective gear, such as gloves and eye protection, when removing nocks. This minimizes the risk of accidental injury due to splinters or other mishaps during the process.
- Follow manufacturer guidelines: Pay close attention to the manufacturer’s instructions for removing nocks from your specific type of carbon arrows. Adhering to their guidelines ensures that you follow the proper techniques and avoid any potential damage to your equipment.
- Seek professional assistance if uncertain: If you are unsure about the proper nock removal techniques or lack experience in handling carbon arrows, it is best to seek guidance from a professional or experienced archer. Their expertise will help you avoid mistakes and ensure the safety of both yourself and your equipment.
Mastering the art of nock removal for carbon arrows involves understanding the importance of proper techniques, engaging in regular maintenance, and prioritizing safety throughout the process. By following these guidelines, you can optimize arrow performance, extend the lifespan of your equipment, and enjoy a safer and more personalized shooting experience.
Frequently Asked Questions On How To Remove Nocks From Carbon Arrows
Are Arrow Nocks Glued In?
Yes, arrow nocks are typically glued in place to secure them to the arrow shaft.
Can You Replace Nocks On Arrows?
Yes, you can replace nocks on arrows.
Can You Remove Inserts From Carbon Arrows?
Yes, you can remove inserts from carbon arrows.
Do You Glue In Nocks On Carbon Arrows?
Yes, we glue in nocks on carbon arrows for secure attachment and optimal performance.
Conclusion
By following the steps outlined you can effectively remove nocks from carbon arrows without causing any damage. Remember to always work in a well-ventilated area and use the proper tools for the job. Starting with softening the adhesive, gently twisting and pulling the nock, and using a debonding agent if necessary, you can safely remove the nocks without compromising the integrity of your carbon arrows.
It’s important to take your time and be patient throughout the process to avoid any accidents or mishaps. Once the nocks are removed, you can easily replace them with new ones or make any necessary adjustments to your arrows. With a little practice and the right techniques, nock removal will become a simple task that will help improve the performance and lifespan of your carbon arrows.