To make a crossbow target, gather a foam block or hay bales and affix a target face onto it using adhesive or staples.
Materials Needed
Foam Board Or Styrofoam
One of the most important materials you’ll need to make a crossbow target is foam board or styrofoam. This material is ideal for absorbing the impact of the bolts and arrows, preventing them from rebounding or causing damage.
Foam board is lightweight, making it easy to handle and transport. Styrofoam, on the other hand, is a durable material that can withstand repeated strikes without breaking.
No matter which option you choose, ensure that the foam board or styrofoam is thick enough to provide sufficient stopping power. This will ensure a safe and effective target for your crossbow practice.
Plywood Or Wooden Frame
In addition to the foam board or styrofoam, you’ll need a plywood or wooden frame to provide stability and support to your crossbow target. This frame serves as the base on which the foam board or styrofoam will be mounted. Plywood is an excellent choice for a frame as it is sturdy and easy to work with.
However, if you prefer a more rustic or natural look, a wooden frame can also be a great option. Whichever material you choose, make sure it is of good quality and offers enough structural support to withstand the impact of the bolts and arrows.
Box Cutter Or Utility Knife
To cut and shape the foam board or styrofoam, you’ll need a box cutter or utility knife. These tools are essential for creating the desired dimensions and contours of the target. A box cutter or utility knife with a sharp blade will make the cutting process smoother and more precise.
Be sure to use caution when working with these tools and always cut away from your body to avoid any accidents or injuries.
Screws Or Nails
When assembling the wooden frame or mounting the foam board or styrofoam, you will need screws or nails to hold everything together securely. If you choose a plywood frame, screws are the preferred option as they provide a stronger and more robust connection.
On the other hand, if you opt for a wooden frame, nails can be a suitable choice. Whichever fastening method you choose, ensure that the screws or nails are long enough to penetrate through the frame and securely attach the foam board or styrofoam.
Measuring Tape Or Ruler
Accurate measurements are crucial when making a crossbow target. To ensure the proper alignment and dimensions of the foam board or styrofoam and the frame, a measuring tape or ruler is essential. With these tools, you can precisely measure and mark the desired size for the target.
This will help you create a consistent and well-balanced target that will enhance your accuracy and shooting experience.
Marker Or Pencil
A marker or pencil is necessary for marking the cutting lines on the foam board or styrofoam and for accurate measurements on the frame. These markings will guide you during the cutting and assembly process, ensuring the components fit together seamlessly.
Using a marker or pencil that contrasts with the foam board or styrofoam color will help you see the markings clearly and ensure precision in your work.
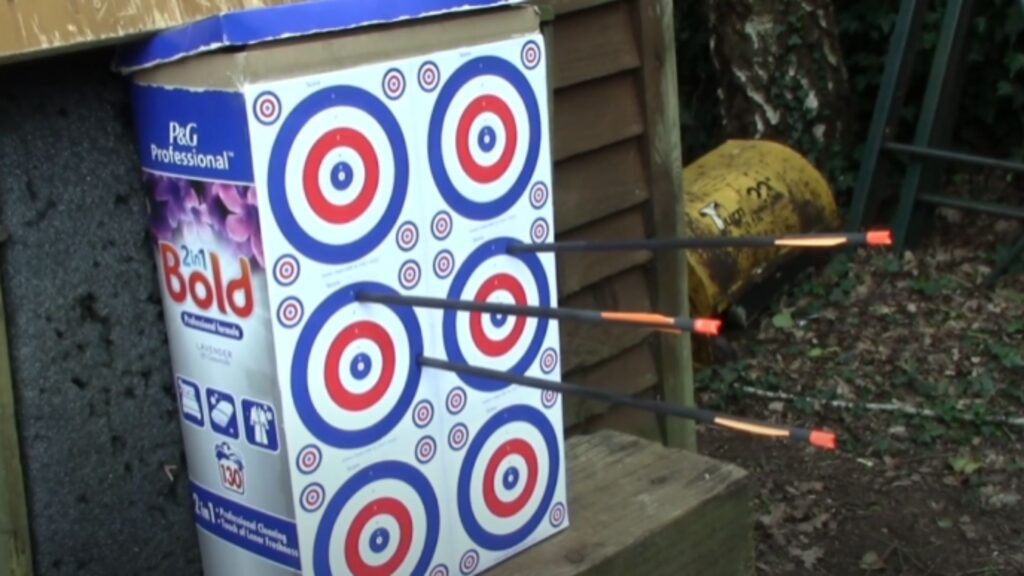
Step 1: Creating Target Zones
Creating Target Zones is a crucial step in making a crossbow target. By marking target zones on the foam board or styrofoam and designating different point values for each zone, you can enhance the challenge and excitement of your crossbow practice sessions. In this section, we will walk you through the process of creating these target zones and assigning point values. So, let’s dive in!
Marking Target Zones On The Foam Board Or Styrofoam
To begin creating target zones, you will need a foam board or styrofoam that is large enough to accommodate your desired target size.
Once you have your material ready, follow these steps:
1. With a marker or pen, draw a clear outline of the target shape you want. You can choose a traditional bullseye design or get creative with various shapes and sizes.
2. Divide the target into distinct zones using bold lines or specific colors. These zones will serve as different areas for the crossbow to hit, giving you varied challenges during shooting practice.
3. Make sure the zones are large enough to be clearly visible from a distance. You want to ensure that you can easily differentiate between different zones while aiming.
4. Label each zone according to its designated point value. This will help you keep track of your score when shooting.
Designating Different Point Values For Each Target Zone
Assigning different point values to each target zone adds an element of strategy to your crossbow practice.
Here’s how you can do it effectively:
1. Determine the level of difficulty for each target zone. Typically, smaller and more centrally located zones are more challenging than larger and outer zones.
2. Allocate higher point values to the more challenging zones and lower point values to the easier ones. For example, you could assign 10 points to the bullseye, 5 points to the next ring, and 1 point for the outermost ring. Adjust these values according to your skill level and personal preference.
3. Keep in mind that the total number of points should add up to a reasonable score. You don’t want scoring to become too easy or too difficult. Aim for a balance.
4. Once you have assigned point values, make sure they are clearly visible on the target, either within or beside each zone. This will help you track your score accurately during crossbow practice.
By creating target zones and assigning different point values, you not only improve your accuracy and precision but also add an element of challenge and fun to your crossbow shooting sessions.
So, get your foam board or styrofoam ready, grab your markers, and start designing your personalized crossbow target with clearly marked target zones and designated point values!
Step 2: Building The Wooden Frame
Building the Wooden Frame One of the most essential components of a crossbow target is the sturdy wooden frame. This frame acts as the backbone, providing stability and support for the target material.
In this section, we will guide you through the process of building the wooden frame for your crossbow target, ensuring its durability and longevity.
Measuring And Cutting The Wooden Frame To The Desired Dimensions
Before you begin cutting the wood, it is essential to measure the dimensions that will fit your specific needs. The frame should be large enough to accommodate the target material and provide ample space for practicing your crossbow skills.
Grab your measuring tape and determine the length and width of the target you want. Ensure you have the following tools handy:
- Circular saw
- Miter saw
- Pencil
- Safety goggles.
Once you have your measurements, use a pencil to mark the dimensions on the wood. Remember to add a few inches on each side to allow for the thickness of the target material. This will prevent any overlap that could cause arrow damage.
Now, put on your safety goggles and carefully cut the wood following the marked lines using a circular saw. Alternatively, you can use a miter saw if you prefer. Make sure your cuts are straight and precise, giving your frame a clean and professional look.
Assembling The Wooden Frame With Screws Or Nails
Now that you have cut the individual pieces of wood for your frame, it’s time to assemble them to create a sturdy structure.
For this step, you will need screws or nails, a power drill or hammer, and a measuring tape. Before you begin, lay out the pieces of wood on a flat and clean surface where you want to create your frame.
Using your measuring tape, ensure that the frame pieces are aligned correctly. This will guarantee a level and even frame.
You can also use a carpenter’s square to confirm the corners are at a perfect 90-degree angle. Once you are satisfied with the positioning, it’s time to secure the frame together.
If you opt for screws, use a power drill with the appropriate screwdriver bit to attach the pieces of wood. Make sure to drill pilot holes first to prevent any splitting.
Insert the screws at regular intervals on each side, ensuring that they penetrate both pieces of wood securely.
If you prefer to use nails instead, a hammer will do the job. Just ensure that the nails are long enough to provide sufficient support and stability.
Step 3: Practicing Safety Measures
When it comes to engaging in any kind of archery activity, ensuring the safety of yourself and others should always be your top priority. Crossbow shooting is no exception, and there are several important safety measures you should take before beginning your target practice sessions. In this section, we will discuss some essential safety precautions that will help you enjoy a risk-free crossbow shooting experience.
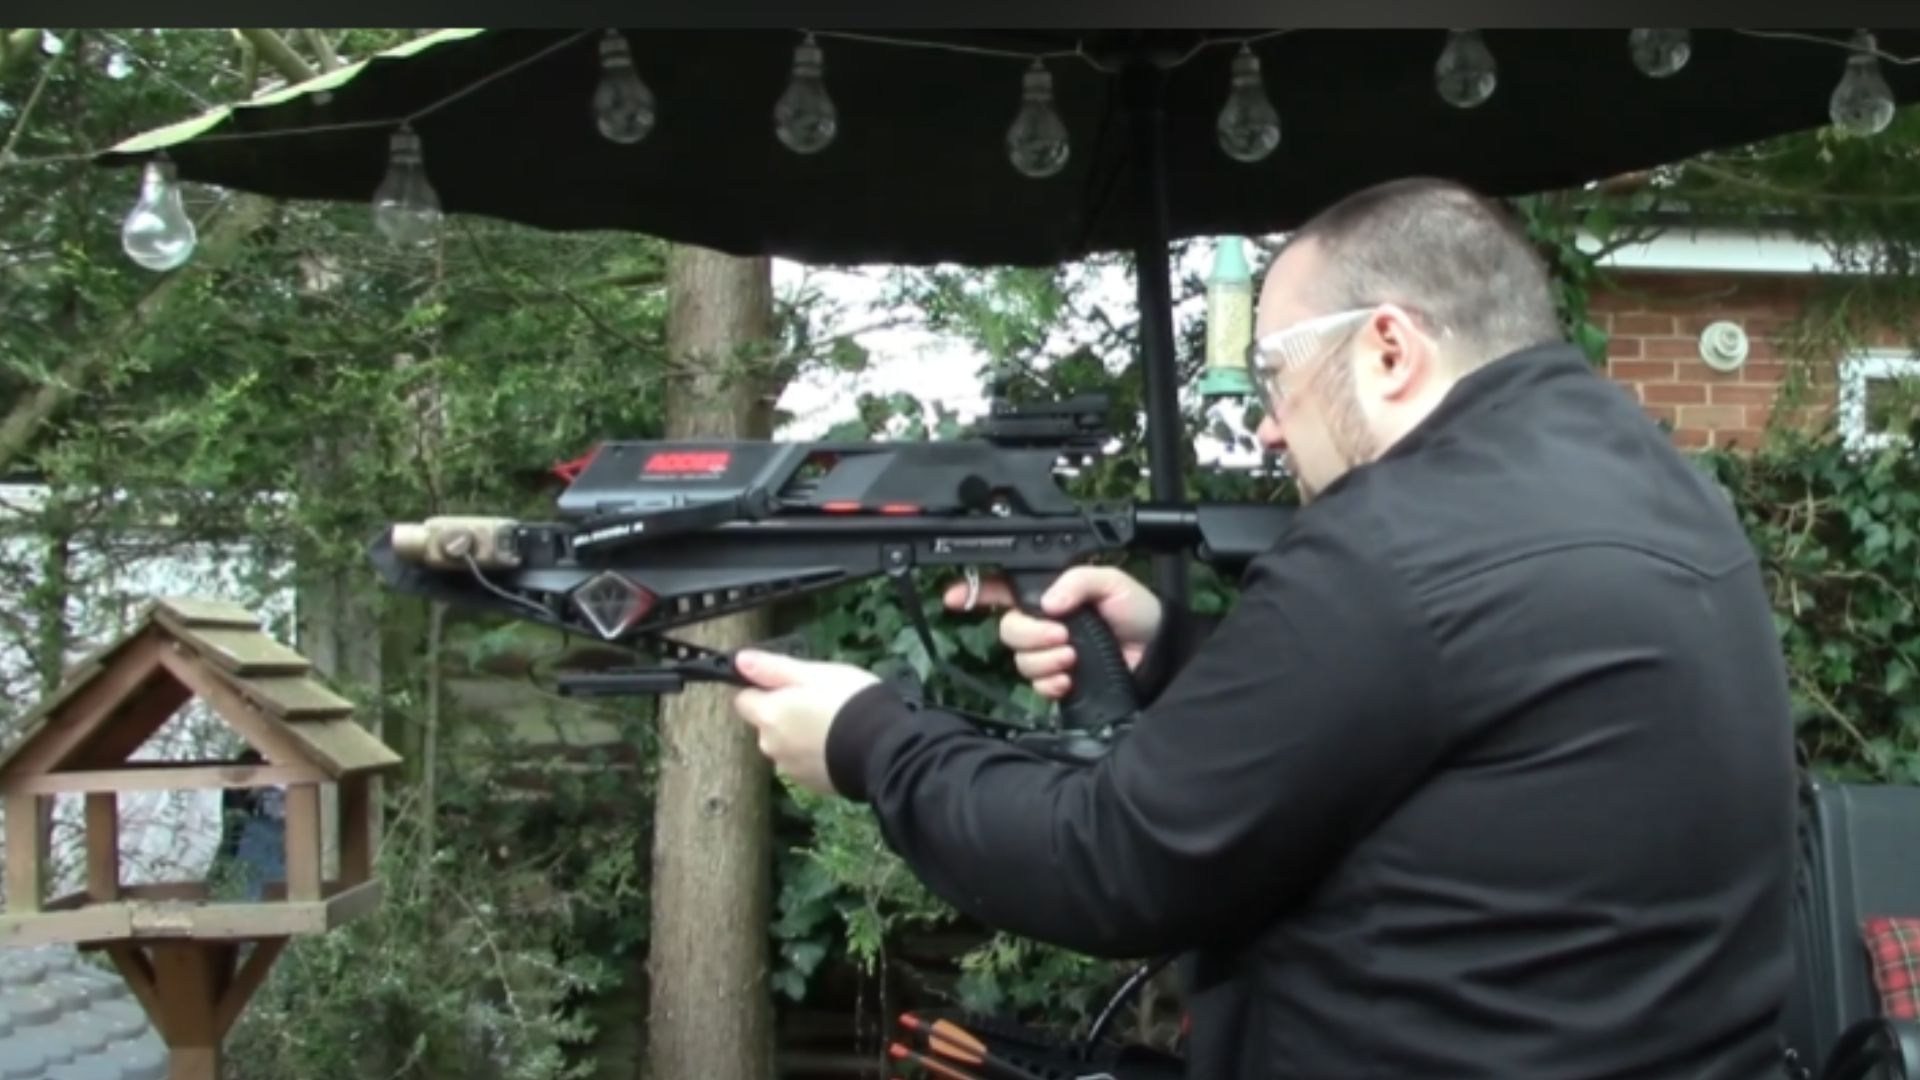
Wearing Protective Gear, Such As Goggles And Gloves
Before you start shooting, it is essential to put on proper protective gear to safeguard yourself against any potential injuries. Wearing goggles or safety glasses will protect your eyes from any flying debris or broken arrows that may occur during your practice session.
Additionally, using gloves will ensure a firm grip on your crossbow and minimize the risk of any slipping or mishandling accidents that could cause harm.
Remember, safety should always come first, and investing in good quality protective equipment is a small price to pay for your well-being.
Establishing A Safe Shooting Distance
Establishing a safe shooting distance is crucial to avoid accidents and maintain a responsible shooting environment. Ideally, you should have a dedicated shooting range or a spacious backyard with sufficient space to create a safe shooting lane.
The distance between you and the target should be carefully measured and adjusted to comply with recommended safety regulations or local bylaws. A clear and open shooting area will help minimize the chances of arrows straying off course and potentially harming yourself or anyone in the vicinity.
Using Appropriate Crossbow And Arrow Types
Using the appropriate crossbow and arrow types is vital for ensuring the safety of your shooting experience.
Different crossbows have unique specifications and recommended arrow types that should be strictly followed. Always refer to the manufacturer’s guidelines to determine the compatible arrow length, weight, and type for your specific crossbow model.
Using arrows that are designed for your crossbow will minimize the risk of any malfunctions or accidents that could occur due to incompatible equipment.
Remember, using the right tools for the job is a significant step toward maintaining a secure shooting environment.
Step 4: Choosing The Right Location
Finding A Safe And Open Space
When it comes to making a crossbow target, choosing the right location is crucial. The first step in selecting the perfect spot is to find a safe and open space. Having a large area that is free from obstacles or obstructions is essential for ensuring the safety of yourself and others.
This means avoiding crowded areas or places with heavy foot traffic. Look for an open field or a designated shooting range where you can set up your target without any hindrance.
Furthermore, it is important to consider the distance between your shooting location and any nearby bystanders or buildings.
Be sure to comply with local regulations and ensure that you have ample space to shoot without endangering anyone or causing damage to property.
Ensuring A Clear Shooting Path
Once you have found a safe and open space, the next step is to ensure you have a clear shooting path. This means selecting a location that allows for a clear line of sight between you and the target. Avoid areas with dense vegetation or tall structures that may obstruct your view or cause deflections.
A clear shooting path not only helps you accurately aim at the target but also minimizes the risk of any projectiles hitting unintended targets.
Take a moment to survey the area and identify any potential obstacles that may interfere with your shooting. It is essential to prioritize safety and choose a location that offers a clear and unobstructed path for your crossbow bolts to travel.
Considering Noise And Privacy
While safety and a clear shooting path are important factors to consider when choosing a location for your crossbow target, it is also crucial to take into account noise and privacy concerns. Crossbows can produce a significant amount of noise when firing, especially if you are using higher draw-weight models.
It is considerate to choose a location that minimizes noise disruption to others nearby, especially in residential areas or public spaces.
If you are seeking privacy during your crossbow practice sessions, select a secluded location where you can feel comfortable and uninterrupted.
This might include private land, remote areas away from heavily populated regions, or even an adequately soundproofed backyard. Prioritize finding a location that provides both a serene environment for your shooting practice and respects the peace and tranquility of others.
Step 5: Setting Up The Crossbow Target
Before you can start practicing your crossbow skills, it’s crucial to set up your target properly. Proper setup will ensure safety and accuracy, allowing you to make the most of your practice sessions.
In this section, we will guide you through the process of setting up the crossbow target, including attaching it to a stable support or stand, and ensuring it’s at the appropriate height and angle.
Attaching The Target To A Stable Support Or Stand
When attaching the target to a stable support or stand, there are a few key considerations to keep in mind. First, choose a support or stand that is sturdy and can withstand the force of the crossbow bolts. This will prevent the target from wobbling or falling over during practice.
One effective option is to use a target stand specifically designed for crossbows. These stands often feature adjustable height and width, allowing you to customize the setup to fit your needs.
Alternatively, you can create a DIY stand using wooden posts or metal pipes firmly planted in the ground. Whichever option you choose, ensure that the target is securely fastened to the stand to prevent any unwanted movement.
Ensuring The Target Is At The Appropriate Height And Angle
Proper height and angle are crucial for an effective crossbow target setup. The height of the target will largely depend on your shooting position and preferences. Generally, it’s recommended to set the target at a height that aligns with your eye level when aiming. This allows for a more natural shooting position and better accuracy.
As for the angle, it’s important to position the target at a slight downward angle. This ensures that any missed shots will hit the ground safely, reducing the risk of ricochets or unpredictable bounces. Aim for an angle of around 10 degrees downward from your shooting position.
It’s worth noting that the appropriate height and angle may vary depending on the specific crossbow model and shooting style. Therefore, it can be helpful to experiment with different setups and make adjustments accordingly.
Maintaining And Replacing The Target
Inspecting and repairing your crossbow target regularly is essential to ensure its longevity and effectiveness. Over time, constant use and exposure to the elements can cause wear and tear on the target, affecting its performance and accuracy.
By following a few simple steps, you can keep your target in optimum condition and avoid costly replacements.
Inspecting And Repairing The Target Regularly
Regular inspections of your crossbow target are crucial to identify any areas of damage or weakness that may affect its functionality. Here are some steps to take when inspecting and repairing your target:
- Check for visible signs of damage: Look for any noticeable holes, tears, or frayed areas on the surface of the target. These weak spots may compromise its ability to stop arrows effectively.
- Examine the backing material: Inspect the backing material behind the target face, whether it is foam boards or styrofoam. Ensure there are no signs of deterioration or crumbling.
- Repair small damages: If you notice minor holes or tears in the target face, you can fix them easily using target repair tools or adhesive patches designed for this purpose. Apply them firmly to ensure a secure and long-lasting repair.
- Replace damaged parts: In the case of significant damage or irreparable wear, certain parts of the target may need to be replaced entirely. This can include the foam boards or styrofoam backing.
Replacing The Foam Board Or Styrofoam When Necessary
If the foam boards or styrofoam backing of your crossbow target become too worn out or damaged, it is crucial to replace them promptly. Here are some guidelines to follow in this process:
- Determine the appropriate replacement material: Choose the right kind of foam boards or styrofoam based on your specific crossbow target model. Ensure it is of adequate thickness and density to effectively stop the arrows.
- Remove the old backing material: Carefully detach the damaged foam boards or styrofoam from the target frame. Clean the frame thoroughly, removing any loose debris or adhesive remnants.
- Install the new backing material: Cut the replacement foam boards or styrofoam to fit the target frame precisely. Secure them tightly using adhesive or fasteners, ensuring they are securely in place.
- Test the replacement: Before using the target, shoot a few arrows to ensure the new backing material is functioning correctly and provides the desired stopping power.
By regularly inspecting, repairing, and replacing your crossbow target as needed, you can maintain its performance and extend its lifespan. Keeping your target in good condition not only enhances your shooting experience but also ensures safety during practice sessions. Take the necessary steps to care for your target, and you’ll enjoy accurate shots and reliable performance for years to come.
Preparing The Foam Board Or Styrofoam
When it comes to practicing your crossbow skills, having a target that can withstand repeated shots is essential. Making your own crossbow target can save you money and allow you to customize it to your preferred size and design.
One of the key steps in creating a crossbow target is preparing the foam board or Styrofoam. This ensures that the target is resilient enough to withstand the force of the bolts and prevent them from penetrating through.
Cutting The Foam Board To The Desired Size
To start, you’ll need a foam board or Styrofoam sheet that is large enough to accommodate the size of your target. Measure and mark the desired dimensions on the foam board using a ruler and a marker.
Make sure to choose a size that provides enough surface area for you to aim at. Once you have the dimensions marked, use a utility knife or a foam cutter to carefully cut along the lines, ensuring a clean and straight cut. It’s important to be cautious and use protective gloves when working with sharp objects.
Securing The Foam Board Onto The Plywood Or Wooden Frame
Now that the foam board is cut to the desired size, you’ll need to secure it onto a plywood or wooden frame. This frame provides stability and structural support for the target. Place the foam board onto the center of the plywood or wooden frame, ensuring that all edges are aligned.
Using a staple gun or nails, secure the foam board onto the frame by fastening it at regular intervals along the edges.
This will prevent the foam board from shifting or falling off during use. Make sure to secure each fastening tightly to ensure a sturdy target that can endure multiple shots.
Your foam board or Styrofoam is now prepared, and you’re one step closer to having your very own crossbow target. With the foam board securely attached to the frame, you can now focus on adding any additional layers or designs to enhance its durability and aesthetic appeal.
Stay tuned for our next blog post, where we’ll explore strategies for reinforcing your crossbow target for long-lasting use. Happy shooting!
Frequently Asked Questions For How To Make A Crossbow Target
Can I Make A Crossbow Target At Home?
Yes, you can easily make a crossbow target at home using simple materials like foam, hay bales, or layered cardboard. This DIY project will save you money and allow you to customize the target to your desired size and shape.
What Materials Do I Need To Make A Crossbow Target?
To make a crossbow target, you will need some basic materials such as a large foam block or hay bales, a target face (paper or fabric), and zip ties or twine to secure the target face to the foam or hay bales.
Optional materials include paint and stencils for decorating the target.
How Do I Construct A Crossbow Target?
To construct a crossbow target, start by choosing your desired target material (foam, hay bales, or layered cardboard). If using foam, cut it to the desired size and shape. Attach the target face to the front of the target. Secure the target face and the target material together using zip ties or twine.
Optionally, paint and decorate the target for added visual appeal.
What Size Should A Crossbow Target Be?
The ideal size for a crossbow target depends on your shooting distance and skill level. As a general guideline, a target size of 18 inches by 18 inches is suitable for shorter distances, while a larger target measuring 24 inches by 24 inches or more is recommended for longer shooting distances.
Adjust the size according to your preferences and abilities.
Conclusion
Creating a crossbow target is a simple and cost-effective solution for practicing your archery skills. By following the step-by-step instructions provided in this blog post, you can easily construct your own target using easily accessible materials.
Whether you’re a beginner or an experienced archer, having a sturdy and reliable target allows you to enhance your accuracy and precision.
So why wait? Start building your own crossbow target today and improve your archery game!